panasonic lumix dc-g9
Panasonic Lumix DC-G9
Panasonic Lumix DC-G9 setup instructions for stop motion animation or time-lapse photography with Dragonframe
Supported Versions
Requires Dragonframe 4.3.4 or newer. (5.x, 2024.x, 2025.x are newer).
Live View
The Panasonic Lumix DC-G9 provides a live view via its USB connection. The live view size is 1280 x 960.
(The camera will have a smaller live view size in DF4.)
Camera Settings
Dragonframe controls the Panasonic Lumix DC-G9 ISO, shutter speed, and aperture (with digital lens).
Considerations
When using exposure simulation (Constant Preview : On), the live view refresh rate will slow down to approximately the shutter speed.
Product Info
You can find the Panasonic Lumix DC-G9 manual and specifications at the Panasonic website.
Manual Lens to Avoid Flicker
To avoid any potential flicker that can be caused by electronically controlled aperture lenses, please consider using a fully manual aperture lens.
Learn More about Aperture Flicker
Setup Instructions
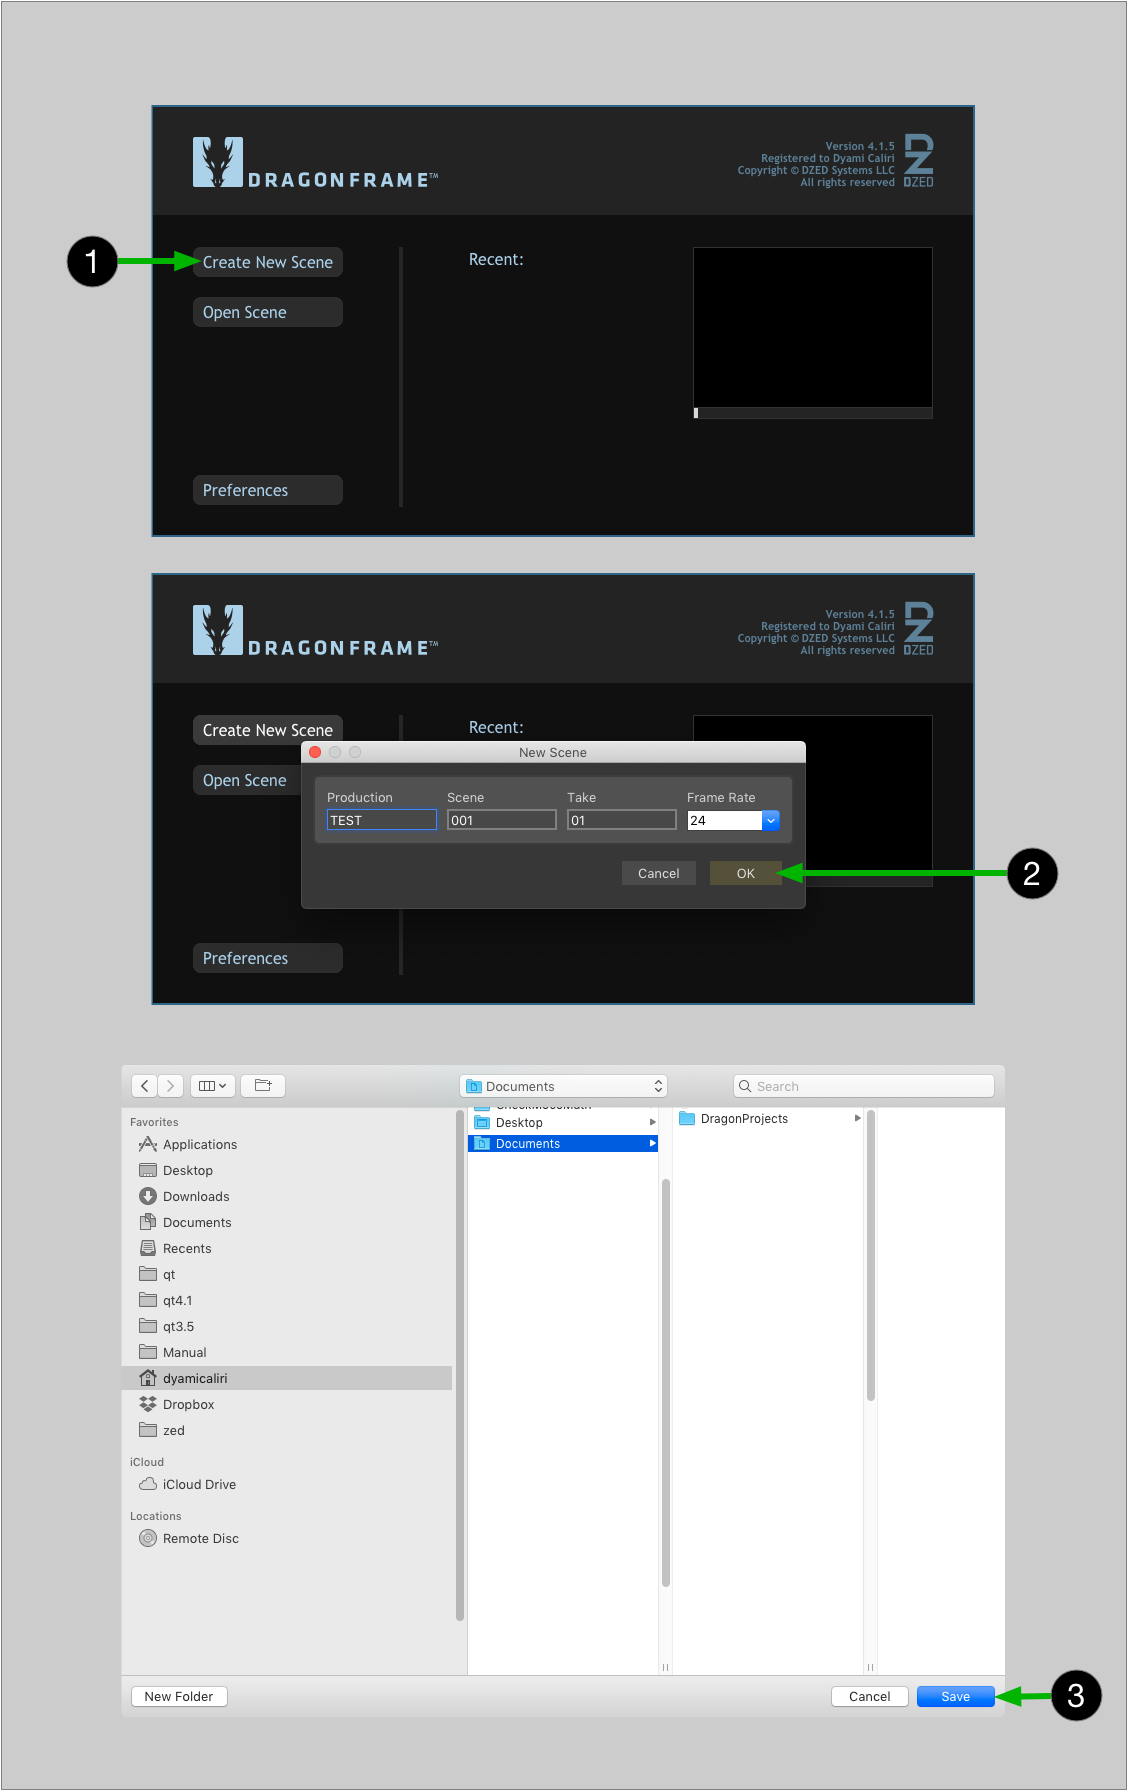
- Create a new scene or open an existing scene. (Dragonframe will not connect to your camera unless you have a scene open.)
- Power your camera by AC power if possible, or use a fully charged battery.
- Close any other applications that might connect to your camera.
- - For macOS, Open Image Capture, select your camera, then in pop up area in lower-left select Connection camera opens: No application. (See Picture)
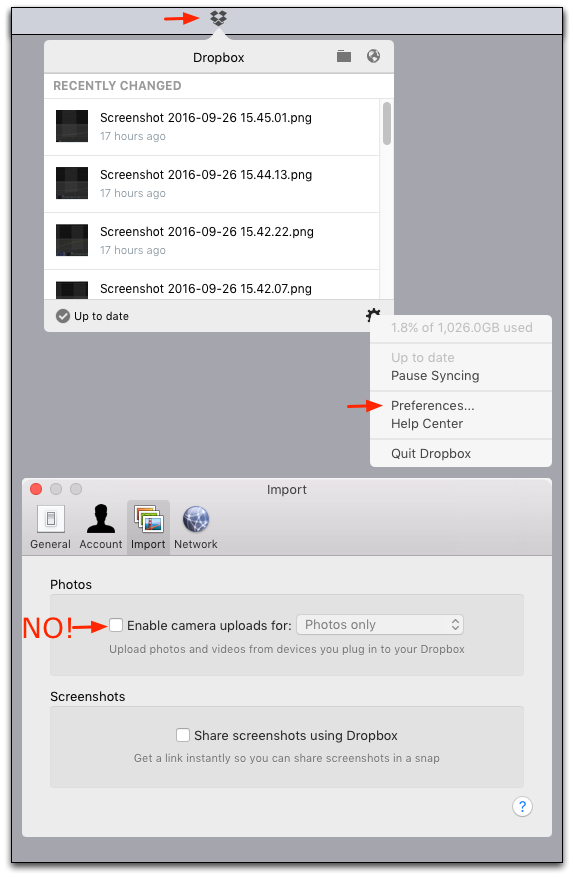
- Make sure Dropbox is not a client of the camera.
- You may need to quit Google Backup and Sync, since it can interfere with the camera even if you turn off syncing.
- If you have anti-virus software, white-list Dragonframe so that it may access your camera.
- Set the Mode Dial to Manual (M).

- Set the Drive Mode Dial to Single.
- Set Setup | USB Mode to PC(Tether).
The camera will not connect unless you do this. - Set ISO increments to 1/3 (in Setup Menu #3).
- Set Focus Selection (dial on back of camera) to MF.
- Set Rec | Aspect Ratio to 4:3.
- Set Custom Settings | Monitor/Display | Constant Preview to OFF.
- Set Custom Settings | Monitor/Display | Peaking to OFF.
- Connect your camera to the computer with an appropriate USB cable.
- Proceed to the Cinematography workspace to adjust the camera exposure settings, check focus, and take test shots.