z-cam e2
Z CAM E2
Z CAM E2 setup instructions for stop motion animation or time-lapse photography with Dragonframe
Supported Versions
Requires Dragonframe 5.1.5 or newer. (2024.x, 2025.x are newer).
Live View
The Z CAM E2 provides a live view via its Ethernet connection. The live view size is 1280 x 720.
Camera Settings
Dragonframe controls the Z CAM E2 ISO, shutter speed, aperture (with digital lens), image quality, and size.
Product Info
You can find the Z CAM E2 manual and specifications at the Z CAM website.
Setup Instructions
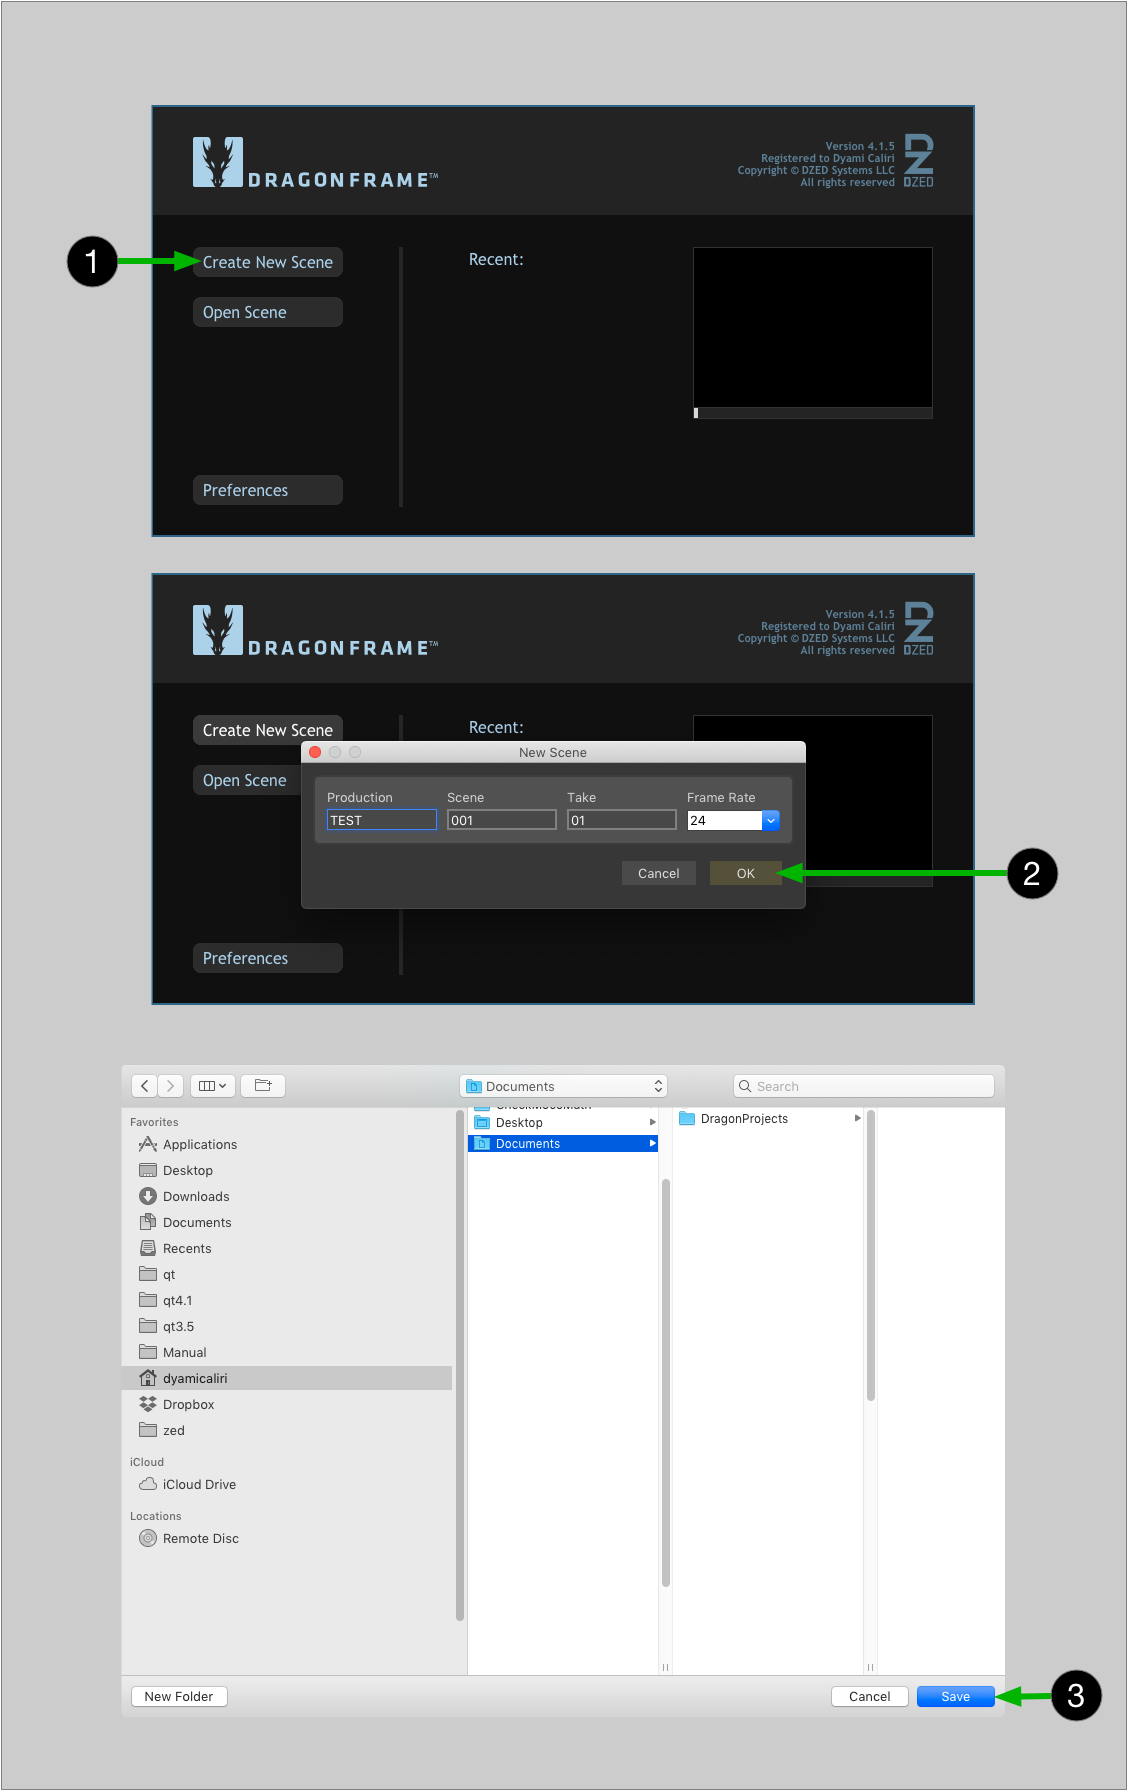
- Create a new scene or open an existing scene. (Dragonframe will not connect to your camera unless you have a scene open.)
- Connect the camera's ethernet port to a hub/router for your local network.
- On the camera, go to the Connect menu, Network and set ETH. Mode to Router.
- Exit the Network menu and return to it. If the camera is connected properly to the network, the ETH. IP should now show a valid local network address.
- In DF, open the Scene menu and choose Cameras..., then press Configure IP Cameras....
- Click Add to add a camera.
- Choose Z CAM E2 from the dropdown.
- Enter the IP address of the camera.
- Press OK in that dialog, and then OK to dismiss the IP Cameras dialog.
- Select Z CAM E2 as the Capture Source and Video Assist Source.
- Make sure to have a memory card in the camera. This is required for capturing hi-resolution stills.
- If you are using macOS 15 or newer, and Dragonframe 2024 or newer, and the camera does not appear, follow the instructions in our FAQ to resolve the issue.
- Proceed to the Cinematography workspace to adjust the camera exposure settings, check focus, and take test shots.