blackmagic cinema camera 6k
Blackmagic Cinema Camera 6K
Blackmagic Cinema Camera 6K setup instructions for stop motion animation or time-lapse photography with Dragonframe
Supported Versions
Requires Dragonframe 2024.05.1 or newer. (2025.x is newer).
Live View
The Blackmagic Cinema Camera 6K provides a live view over HDMI. This camera requires a separate connection to the computer, via an HDMI capture device, to access the live view. We do not recommend this setup, because it is complicated and fairly expensive. Please consider a used Canon EOS that we support instead.
Camera Settings
Dragonframe controls the Blackmagic Cinema Camera 6K ISO, shutter speed, aperture, and white balance.
Blackmagic Camera Control REST API
This setup is for a specific Blackmagic camera. Dragonframe controls it via the Camera Control REST API. This API does not support any 'Pocket' models.
Product Info
You can find the Blackmagic Cinema Camera 6K manual and specifications at the Blackmagic website.
Setup Instructions
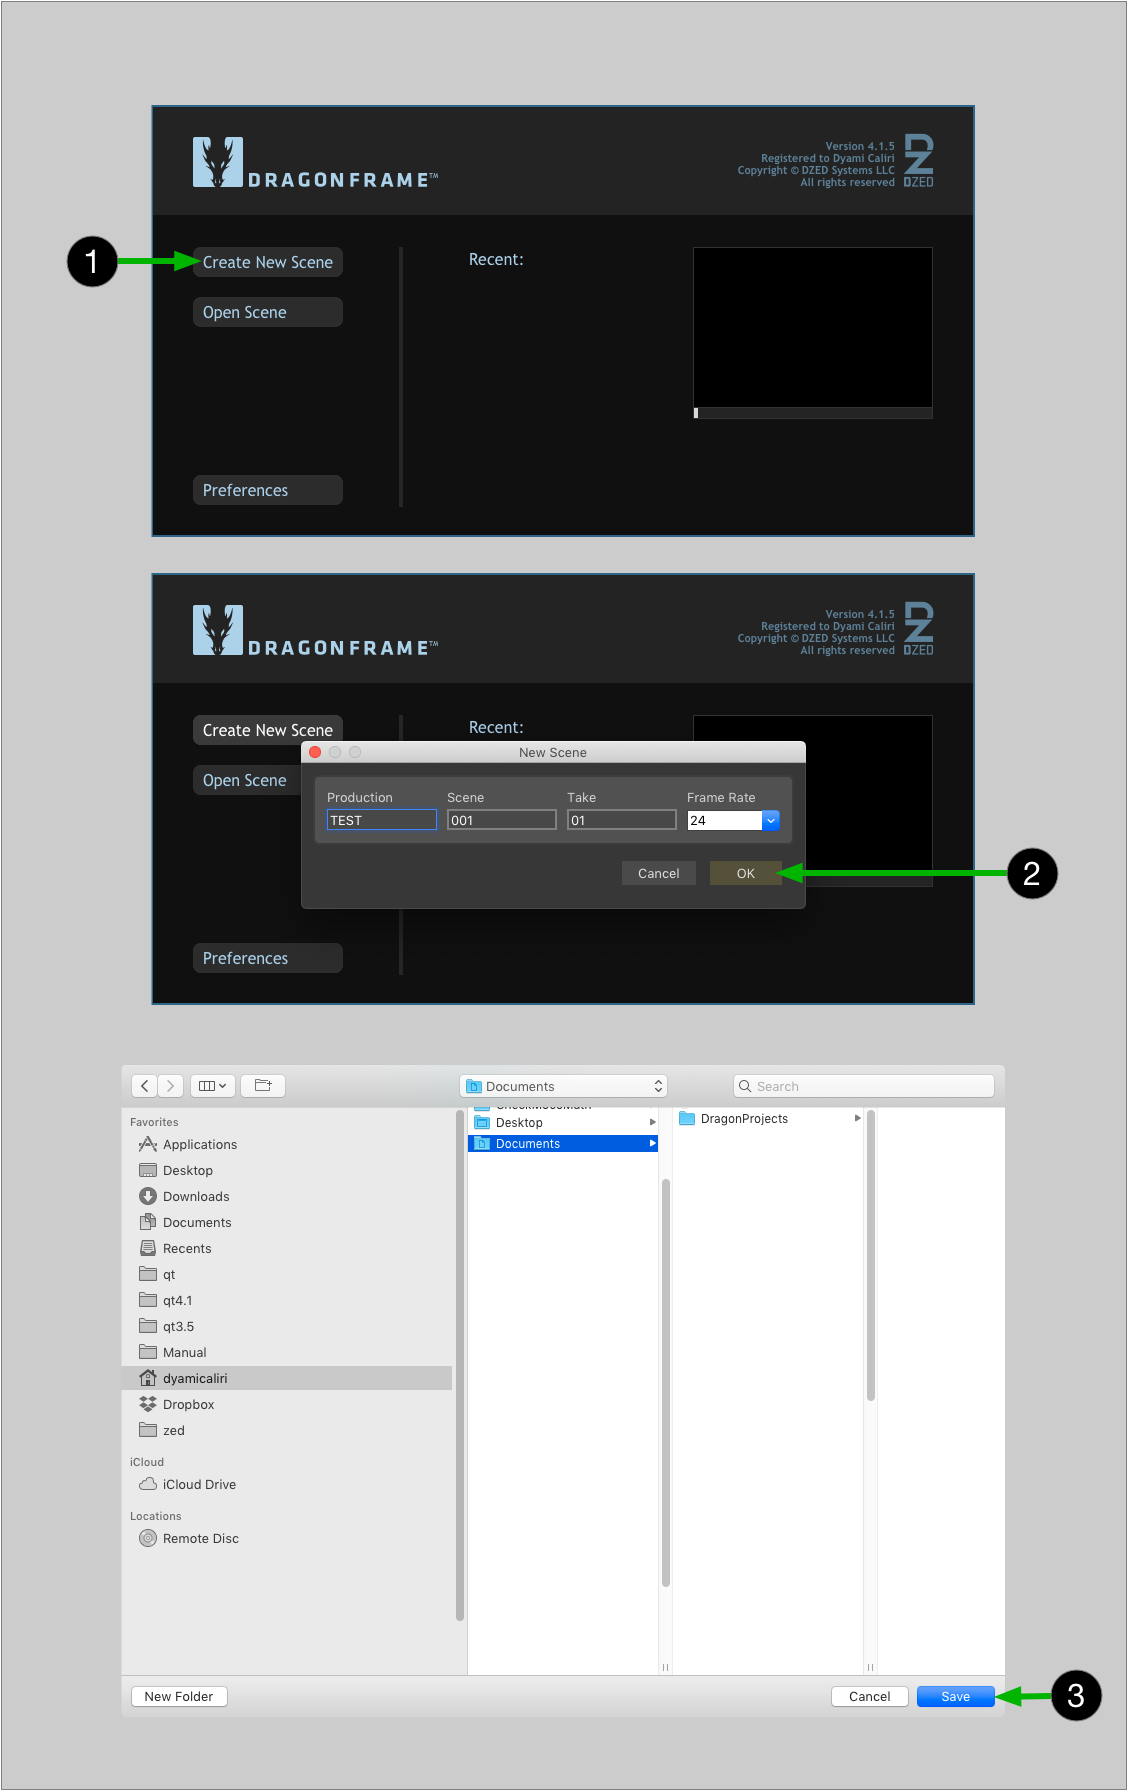
- Create a new scene or open an existing scene. (Dragonframe will not connect to your camera unless you have a scene open.)
- Install Blackmagic Cameras desktop software from the Blackmagic support site.
- Connect the camera to the computer via USB and launch Blackmagic Camera Setup.
- Enable web media manager and smb share.
Note that 'https' will not work with a self-signed certificate. - Make a note of the camera url. It may look like 'blackmagic-Cinema-Camera-6K.local'.
- Connect to the smb share.
- On macOS, go to the Finder menu and select Go | Connect to Server..., provide the smb url and connect as guest.
- Set up the WiFi connection to the camera:
- Go to Scene|Connections and select Configure IP Cameras...
- Select 'Blackmagic Cinema Camera 6K' as the Camera Type.
- Set the Address to 'http://' and then the camera url. For example: 'http://blackmagic-Cinema-Camera-6K.local'.
- Click OK in that dialog and the 'Configure IP Cameras' dialog.
- On the camera, set SETUP | SHUTTER MEASUREMENT to Shutter Speed.
- On the camera, set RECORD | TIMELAPSE to ON.
- On the camera, set RECORD | CAPTURE ONE FRAME EVERY to 2 Seconds.
- Connect your camera's HDMI output to the computer through a compatible HDMI capture device. (Do not connect HDMI directly to the computer!)
- Select the HDMI device as the Video Assist Source in the Capture menu.
- Select your camera as the Capture Source in the Capture menu.
- In Dragonframe, set SMB DRIVE to the location of the smb mount you made earlier.
- Proceed to the Cinematography workspace to adjust the camera exposure settings, check focus, and take test shots.